Aura Mesh  Window Aura Mesh Window

How to Measure Doors and Windows for Replacement in 2026?

Time:2026-09-06 Author:Ethan
0%

Replacing a door or window can improve comfort, security, and energy performance. However, a beautiful product will still fail if the opening measurements are wrong. This 2026 guide explains how to measure doors and windows for replacement with practical steps, clear examples, and careful checks.

Veteran contractor Tom Silva often repeats the classic advice, “Measure twice, cut once.” That rule remains useful, but replacement projects require more than a single width and height. You must inspect the frame, sill, trim, wall condition, and opening shape. A tape measure may show 36 inches at the top, while the middle measures 35 7/8 inches. Small differences matter.

Record every measurement.

Measure width at the top, middle, and bottom. Then measure height on the left, center, and right. Use the smallest reliable dimension, but do not subtract clearance without confirming the manufacturer’s instructions. Check the diagonals as well. Unequal diagonal measurements can reveal a square problem, especially in older homes.

The process is not perfectly predictable. Brickmould, interior casing, moisture damage, or hidden shims may confuse even experienced homeowners. I have seen measurements look correct until the trim was removed. That possibility deserves attention.

You will also learn when to measure the existing unit, the rough opening, or the masonry opening. Photos, sketches, and written notes can prevent costly mix-ups. If the frame is damaged or the opening is severely uneven, consult a qualified installer before ordering. Good measurements reduce surprises, but they cannot replace a careful site assessment.
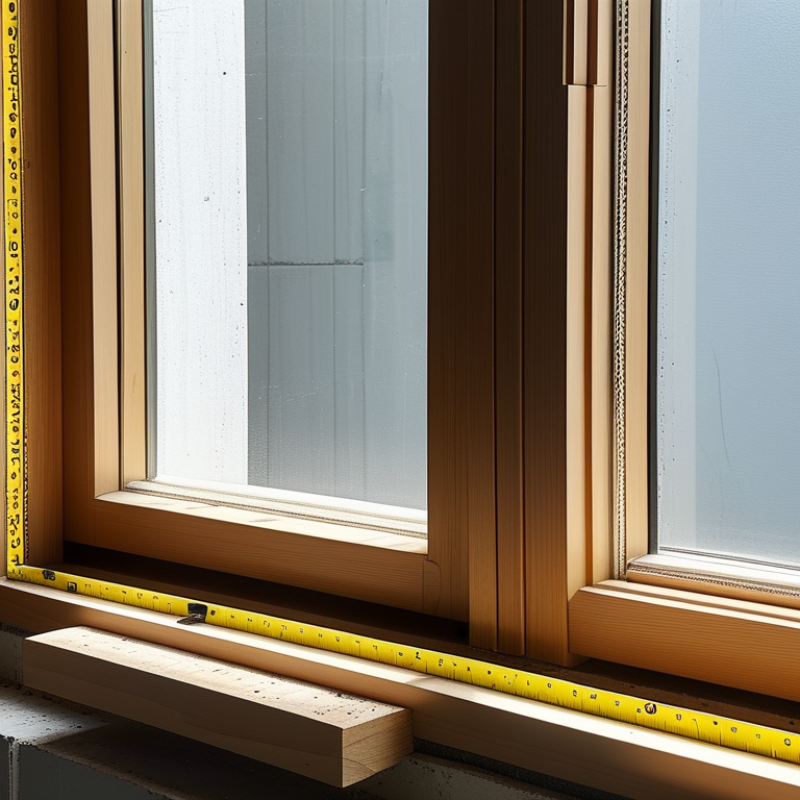
How to Measure Doors and Windows for Replacement in 2026?

Define the Scope and Tools for Measuring Replacement Doors and Windows

How to Measure Doors and Windows for Replacement in 2026?

Define the scope before touching the tape. Decide whether you are replacing the entire frame, the sash, or only the door slab. Record opening width, height, depth, sill condition, handing, and exterior clearance. Measure width at the top, middle, and bottom. Measure height on both sides and through the center. Use the smallest dimensions for planning, not the most convenient ones. Small differences matter.

A steel tape, six-foot level, carpenter’s square, flashlight, camera, and notepad are practical tools. A laser measure can check larger openings, but it should not replace manual readings. Confirm that the opening is square by comparing diagonal measurements. Photograph hidden rot, uneven masonry, and interior trim before removal.

The U.S. Department of Energy reports that windows can account for roughly 25% to 30% of residential heating and cooling energy use. Accurate sizing supports better air sealing and installation performance.

Do not measure only the visible glass. That mistake is common. Include the frame, shims, trim, and drainage path in the scope. For doors, inspect threshold height, swing direction, lock position, and accessibility clearance. Professional fenestration guidance emphasizes plumb, level, and square installation conditions. Still, older buildings rarely cooperate. My measurement sheet would include a “verify on site” note, because one warped sill or hidden layer can change the final order. Recheck every critical dimension before purchasing.

Measure Existing Openings Without Removing the Current Units

How to Measure Doors and Windows for Replacement in 2026?

Measure Existing Openings Without Removing the Current Units

Accurate measurements begin with the existing opening, not the glass or sash. Keep the current door or window installed during the inspection. Measure the width between the inside jambs at the top, middle, and bottom. Record the smallest number. Repeat this process for height, measuring at the left, center, and right sides. Walls are rarely perfectly square.

Measure the frame depth from the interior edge to the exterior stop. Check whether interior trim hides part of the jamb. A narrow steel ruler can reach tight gaps without disturbing the unit. Also measure both diagonals from corner to corner. Differences may reveal a twisted or settled opening. Take clear photos of each corner and write measurements immediately. Memory is unreliable.

I once measured only the center width and missed a six-millimeter difference near the sill. That mistake could have caused poor fitting and unnecessary adjustment. This method is useful, but it is not foolproof. Include the existing frame, trim, sill slope, and any visible gaps in your notes. Do not subtract installation clearance unless the replacement supplier or qualified installer confirms the required allowance. If access is limited, measure from both sides and compare the results. A careful second check is worth the few extra minutes.

Record Width, Height, Depth, and Squareness Measurements Accurately

How to Measure Doors and Windows for Replacement in 2026?

Record Width, Height, Depth, and Squareness Measurements Accurately

Accurate measurements begin with a steel tape, a pencil, and a clear recording sheet. Measure window width at the top, middle, and bottom of the opening. Record the smallest number. Repeat this method for height, measuring the left, center, and right sides.

For doors, measure the rough opening separately from the existing frame. This distinction prevents costly ordering errors. Measure depth from the interior trim edge to the exterior stop or wall surface. Note any trim, plaster, insulation, or unusual blocking that reduces available space.

Check squareness by measuring both diagonal distances across the opening. The two results should be nearly equal.

A larger difference may indicate a shifted frame, settling, or damaged construction. Do not assume the opening is square. It often is not. I once recorded neat measurements from only one corner and missed a six-millimeter difference. That mistake changed the installation plan.

Measure twice, and photograph each opening with its notes. Label every record by room and direction. Use millimeters or inches consistently, never both on the same sheet.

For older buildings, inspect moisture marks and warped sills before trusting the measurements. A professional installer may need to verify these figures on site, especially when masonry, uneven walls, or custom-sized replacements are involved.

Check Installation Conditions, Clearances, and Operating Requirements

How to Measure Doors and Windows for Replacement in 2026?

Measure the opening in several places, not just once. Record width at the top, middle, and sill, then measure height on both sides and the center. The smallest dimension usually controls ordering. Check whether the frame is plumb, level, and square. A difference greater than 6 millimeters can signal movement, poor framing, or hidden damage. Inspect the sill for rot, moisture stains, and soft timber before approving measurements. I have seen perfect-looking openings fail because the sill was never checked.

Clearance matters as much as size. Confirm the door swing, handle reach, nearby cabinets, stairs, and furniture. For windows, check exterior drainage, screen space, and cleaning access. Bedroom replacements must also preserve emergency escape conditions where required. The 2024 International Residential Code commonly specifies a 20-inch minimum clear width, 24-inch minimum clear height, and 5.7-square-foot net opening for emergency escape windows, subject to local adoption. Small details matter.

Operating requirements should be written down. Note whether the window needs ventilation, child safety hardware, or one-handed operation. For doors, measure threshold height, landing depth, and turning space. The U.S. Department of Energy reports that windows can account for 25–30% of residential heating and cooling energy use. The National Fenestration Rating Council identifies U-factor, solar heat gain coefficient, visible transmittance, and air leakage as key performance ratings. Do not choose from measurements alone. I sometimes remeasure after removing interior trim; it feels inefficient, but assumptions create expensive mistakes.

How to Measure Doors and Windows for Replacement in 2026? - Check Installation Conditions, Clearances, and Operating Requirements

Measurement Dimension How to Measure or Inspect Typical Data to Record Installation or Operating Requirement Important Notes
Rough Opening Width Measure horizontally between the structural sides of the opening at the top, middle, and bottom. Example readings: 36 1/4 in, 36 3/8 in, 36 1/4 in. Use the smallest verified dimension. The replacement unit must fit the manufacturer’s required installation gap. Do not order from one measurement alone. Check for bowed framing, shims, deteriorated wood, and masonry irregularities.
Rough Opening Height Measure vertically from the sill or structural base to the top of the opening at the left, center, and right. Example readings: 60 1/4 in, 60 1/8 in, 60 1/4 in. Record the smallest dimension. Allow space for leveling, shimming, insulation, and perimeter sealing as specified for the unit. Do not confuse the rough opening with the visible glass or frame size.
Existing Frame Size Measure the width and height of the existing frame from the inside edges of the frame members. Record frame width and height to the nearest 1/8 in or 1 mm. Useful for insert or pocket replacements, but it does not replace rough-opening measurements. Trim, stops, and interior liners can hide the actual frame dimensions.
Wall Thickness Measure from the interior finished surface to the exterior finished surface at several points. Common residential wall conditions may be approximately 4 1/2 to 6 1/2 in, but verify on site. The replacement frame, extension components, and interior or exterior trim must suit the wall depth. Thick cladding, masonry, insulation layers, and interior returns can change the required configuration.
Sill Slope and Drainage Use a level to check whether the sill slopes toward the exterior and inspect for blocked drainage paths. Record level variance, visible pooling, soft areas, staining, or failed sealant. The sill must be stable, supported, and able to direct water outward without blocking weep or drainage paths. Repair water damage and correct drainage problems before installing the replacement unit.
Frame Squareness Measure both diagonals of the opening from opposite corners. Example: 60 1/4 in and 60 3/8 in diagonals; the difference is 1/8 in. A smaller diagonal difference generally makes alignment easier; confirm the allowable tolerance in the installation instructions. A significantly out-of-square opening may require reframing or corrective carpentry.
Plumb and Level Place a level on both jambs, the head, and the sill. Check for twisting or uneven framing. Record areas that are out of plumb or level and estimate the correction required. The unit must be installed plumb, level, and square so sashes, panels, locks, and weather seals operate correctly. Do not force the frame into alignment by over-tightening fasteners.
Exterior Flashing and Weather Barrier Inspect the head, jambs, sill, housewrap or weather barrier, flashing, and sealant interfaces. Record whether flashing exists, is damaged, or can be integrated with the replacement installation. Use a compatible sill pan or flashing system where required by the wall design and installation instructions. A perimeter bead of sealant alone is not a substitute for correctly managed water drainage.
Interior and Exterior Trim Clearance Measure the distance from the existing frame to nearby casing, siding, brick, drywall, cabinets, and other obstructions. Record available trim width and any projections that could interfere with installation. Leave enough room to fasten, insulate, seal, and finish the unit without covering drainage paths. Replacement trim may be needed when the new frame has a different depth or profile.
Door Panel or Sash Swing Identify the operating direction and mark the full arc or travel path of the moving panel. Record inswing or outswing, left- or right-hand operation, and the clear floor area. The panel must open without striking walls, furniture, railings, appliances, or adjacent doors. Handing is viewed from the reference side specified by the product documentation; confirm before ordering.
Door Threshold and Floor Transition Measure the threshold height and inspect the floor on both sides of the opening. Record threshold height, floor elevation difference, and the width available for transition materials. The threshold must be supported, weather-resistant, and compatible with the finished floor and accessibility needs. Uneven flooring can cause rubbing, poor latching, or excessive clearance under the door.
Operating Clearance Open and close the existing door, window, or sash while checking contact points and hardware movement. Record rubbing, binding, restricted travel, loose hardware, and the location of each obstruction. The replacement must have sufficient clearance for full operation, locking, cleaning, and routine maintenance. Include clearance for handles, cranks, screens, blinds, and removable panels.
Emergency Egress Potential For sleeping rooms and other applicable spaces, check the clear opening after the window is fully opened. Record clear opening width, clear opening height, and clear opening area in the applicable local units. Confirm current local building-code requirements for emergency escape and rescue openings; requirements vary by jurisdiction and room type. A large overall window size does not guarantee a compliant clear opening.
Safety Glazing Location Identify glazing near doors, walking surfaces, wet areas, stairs, and other locations where impact risk may apply. Record hazardous locations and whether safety glazing or another protective solution is required. Verify applicable safety-glazing provisions in the current local building code before ordering. Code triggers depend on location, glazing size, sill height, and proximity to the floor or door.
Fastening Surface Locate solid framing or other approved substrates around the opening and check for rot or cracking. Record stud locations, masonry condition, fastener zones, and damaged sections requiring repair. Fasteners must connect to sound structural material and follow the approved spacing and edge-distance requirements. Do not rely on trim, foam, drywall, or deteriorated wood as the primary structural fastening surface.
Weather and Moisture Conditions Inspect for condensation, mold, staining, drafts, air leakage, and moisture around the opening. Record visible damage, suspected water entry points, and indoor humidity-related condensation. The opening should be dry and repaired before installation; sealants and insulation must be compatible with the surrounding materials. Replacing the unit without correcting the moisture source can lead to recurring damage.
Final Order Verification Compare the field worksheet with the selected unit configuration and installation instructions. Confirm width, height, frame depth, operation, handing, glazing, color, screens, grilles, and accessories. Use verified site measurements and the manufacturer’s approved tolerances; never assume nominal size equals actual size. A qualified installer should confirm code, structural, drainage, and accessibility conditions before fabrication or purchase.
Measurements are field-recording examples and typical planning values, not universal code limits. Always verify the current requirements of the local building authority and the selected product’s installation instructions.

Verify Measurements Before Ordering Replacement Doors or Windows

How to Measure Doors and Windows for Replacement in 2026?

Verify Measurements Before Ordering Replacement Doors or Windows

Accurate measurements begin with the existing opening, not the old door or window. Remove interior trim only when necessary. Measure the width at the top, middle, and bottom. Record the smallest measurement. Then measure height on the left, center, and right sides. Use the shortest height. This approach allows for small framing differences and reduces fitting problems.

Check the opening depth, sill condition, and frame squareness. A tape measure alone is not enough. Use a level to identify leaning jambs and an uneven sill. Measure from solid framing, rather than loose trim or damaged material. Write every measurement down immediately. I once trusted a single width measurement and missed a slight bow in the frame. That mistake would have caused unnecessary adjustment work.

Tips: Measure twice, preferably at different times. Do not round measurements upward. Confirm whether the order requires opening size, frame size, or rough-opening size. Take clear photos of corners, hinges, drainage paths, and visible damage. Before ordering, compare your notes with the installation requirements and confirm the product’s measuring instructions. If measurements differ significantly, pause and inspect the structure again. A professional installer can verify unusual openings, especially in older homes. Small differences matter. Measure carefully.

FAQS

: What should I measure before replacing a door or window?

: Define the replacement scope first. Measure the frame, sash, or door slab. Record width, height, depth, sill condition, handing, and exterior clearance. Do not measure only the visible glass.

How should I measure the opening width?

Measure between the inside jambs at the top, middle, and bottom. Write down the smallest width. Small differences can affect the final fit. Recheck the sill area carefully.

How should I measure opening height?

Measure from the sill to the head at the left, center, and right. Use the smallest height for planning. Older walls may lean or settle. That happens often.

How can I check whether the opening is square?

Measure both diagonal distances from corner to corner. Matching diagonals suggest a squarer opening. A noticeable difference may indicate twisting or settlement. Do not assume the trim is straight.

Which tools are useful for accurate measurements?

Use a steel tape, level, carpenter’s square, flashlight, camera, and notepad. A laser measure can check large openings. It should not replace manual readings. Take photos of every corner.

Should I remove the existing door or window before measuring?

Usually, measure with the current unit installed. Check the jamb, trim, sill slope, and visible gaps. A narrow ruler can reach tight spaces. Measure from both sides when access is limited.

What installation conditions need checking?

Inspect whether the opening is plumb, level, and square. Check for rot, moisture stains, soft timber, and uneven masonry. A six-millimeter difference may signal hidden movement. I once missed a small sill variation. It was not a good assumption.

What clearances and operating details matter?

Check door swing, handle reach, threshold height, landing depth, and turning space. For windows, inspect drainage, screen space, cleaning access, and ventilation needs. Emergency escape requirements may apply in sleeping rooms. Local rules can differ. Verify them before ordering.

Should installation clearance be subtracted from the measurements?

Do not subtract clearance automatically. Confirm the required allowance with the supplier or qualified installer. Record raw measurements separately from adjusted sizes. Recheck every critical dimension before purchasing. Memory is unreliable.

Conclusion

Learning how to measure doors and windows for replacement begins with defining the project scope and preparing reliable tools, such as a tape measure, level, square, flashlight, and notepad. Existing units should normally remain in place while you measure the rough opening, frame dimensions, width, height, and depth at multiple points. Recording the smallest measurements helps account for variations and supports a more accurate replacement order. It is also important to note whether the opening is square by comparing diagonal measurements and checking each side with a level.

Before ordering, inspect the surrounding wall, sill, trim, and fastening areas for obstructions, damage, moisture, or uneven surfaces. Confirm that the replacement unit will have sufficient clearance for installation, opening, closing, ventilation, and nearby handles or fixtures. Review the operating direction and configuration, then recheck every measurement, unit, and location against your notes. Careful verification can reduce fitting problems, installation delays, and unexpected adjustments.

Ethan

Ethan

Ethan is a seasoned marketing professional with a deep expertise in our company's innovative product line. With a passion for sharing knowledge and insights, he takes the lead in regularly updating our corporate blog, where he explores industry trends, product features, and effective marketing......